
Gain Efficiency in Microsoft Outlook
It’s easy to get started with Microsoft Outlook for the basics. However, it is important to explore software deeper to take advantage of the productivity features that are built into the product. It is common for users to only latch on to what they need to know right now. They may only be sending, receiving and filing emails into folders.
AKAVEIL “How To” series will continue to bring you information on sometimes overlooked features of your Microsoft Outlook applications. Learn about two time saving features we have selected for this article… Quick Parts and Distribution Lists. After all, who doesn’t need to save time?
“How To” Quick Parts
This feature will save content you repeat regularly in emails, so you won’t have to create it from scratch every time. By storing your own catalogue (gallery) of Quick Parts and simply inserting them from your saved content, you will easily piece together emails where repetitious content is required.
STEPS for Quick Parts
1 – When writing an email with content you’d like to save for later recall and use, highlight the content (can be any type of content such as: formatted text and/or graphics) click on Insert

2 – Next screen, from the top ribbon on the right side click on Quick Parts. Two choices appear, select Save Selection to Quick Part Gallery…
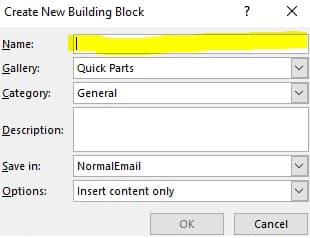
3 – Type a unique name for the content you are adding, keep all the defaults, click OK
4 – To use any content you have saved to the Quick Parts gallery, while writing an email click Insert / Quick Parts / select the name you gave the content from drop-down list
Example: I often tell my team about time saving tips to improve productivity. The highlighted text was entered from Quick Parts without having to type it. The content is inserted wherever the cursor was in my email before inserting the Quick Part…

Note: If you want to modify a saved Quick Part, just change it, highlight and repeat the steps 1-4 above. When prompted for the Name in Step #4, use the same name as before to replace it.
Also, once you insert a saved Quick Part into an email, it’s as if you created it from scratch so you can edit it, move it around, format it differently and so forth for that specific use.
“How To” Distribution Lists
Use this feature for groups of people frequently emailed together. Saves time on adding individual email addresses. Maintain the list to add / remove as it grows or changes.
STEPS for Creating a Distribution List
1 – Click on the People Icon in the lower left of your email client

2 – Click New Contact Group in the upper left
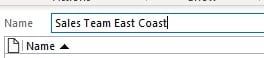
3 – Type the name for this group of contacts. Example…
4 – From the top options click on Add Members select one of the options presented in the drop down:
From Outlook Contacts
From Address Book
New E-mail Contact
5 – Scroll up and down, double click each Name to add from a list or type the email address in the box presented. When done click OK
6 – Click the Save & Close in the upper left

7 – Use the distribution list name to address any New Email instead of typing individual names…
STEPS to Maintain Distribution List
1 – Start the same with People icon lower left
2 – From the contacts lists window that appears, double click the name of the distribution list (i.e. Sales Team East Coast)
3 – Highlight any contact email address in the details screen, look top ribbon, click Remove Member
4 – Click Add Members to proceed as initial steps to include another contact’s email
5 – Remember to Save & Close when done with changes.
Please let us know if you liked this “How To” article!
AKAVEIL Technologies is a Microsoft partner with experience and understanding of the various products and license plans. We work directly with each business as a trusted advisor to assess and recommend the best fit now and scalable into the future. Remain competitive and grow your business with AKAVEIL.